Saturday, August 11, 2012

Clearance Bowls Re-purposed

OK, so it's been a couple weeks since I blogged. I was out of town and then started going through craft withdrawals.
I found these cute wire bowls at Books-A-Million of all places. They were on clearance for $5 a piece and couldn't pass them up.


I decided to make a 2 tier tray and matching wall decor for our guest bathroom.


I used:
2 baskets
1 5/8 dowel rod cut
2 cabinet pulls I found at Hobby Lobby for half off (yay!)
Wood stain I just had sitting around from a former project. 

 First I took my dowel rod and a drill bit. You'll want to make a hole big enough that the drawer pull will fit inside of it. . If your bowls are whole you will also drill holes in the center bottom of them at this time, big enough for the dowel rod to go through. There were already holes in the center of my bowls because of the way they were made but they were not the same size holes from one to another. Because of this I also had to sand the end of my dowel rod to thin it out to fit.

Ta-da! Next, I had the hubs cut the dowel down to 12" and then I stained it. I inserted the dowel into the bottom bowl and hot glued the under side so it couldn't be seen. Then placed the top bowl on and secured it with hot glue as well. Once on top I inserted the drawer pull into the drilled hole and voila!  


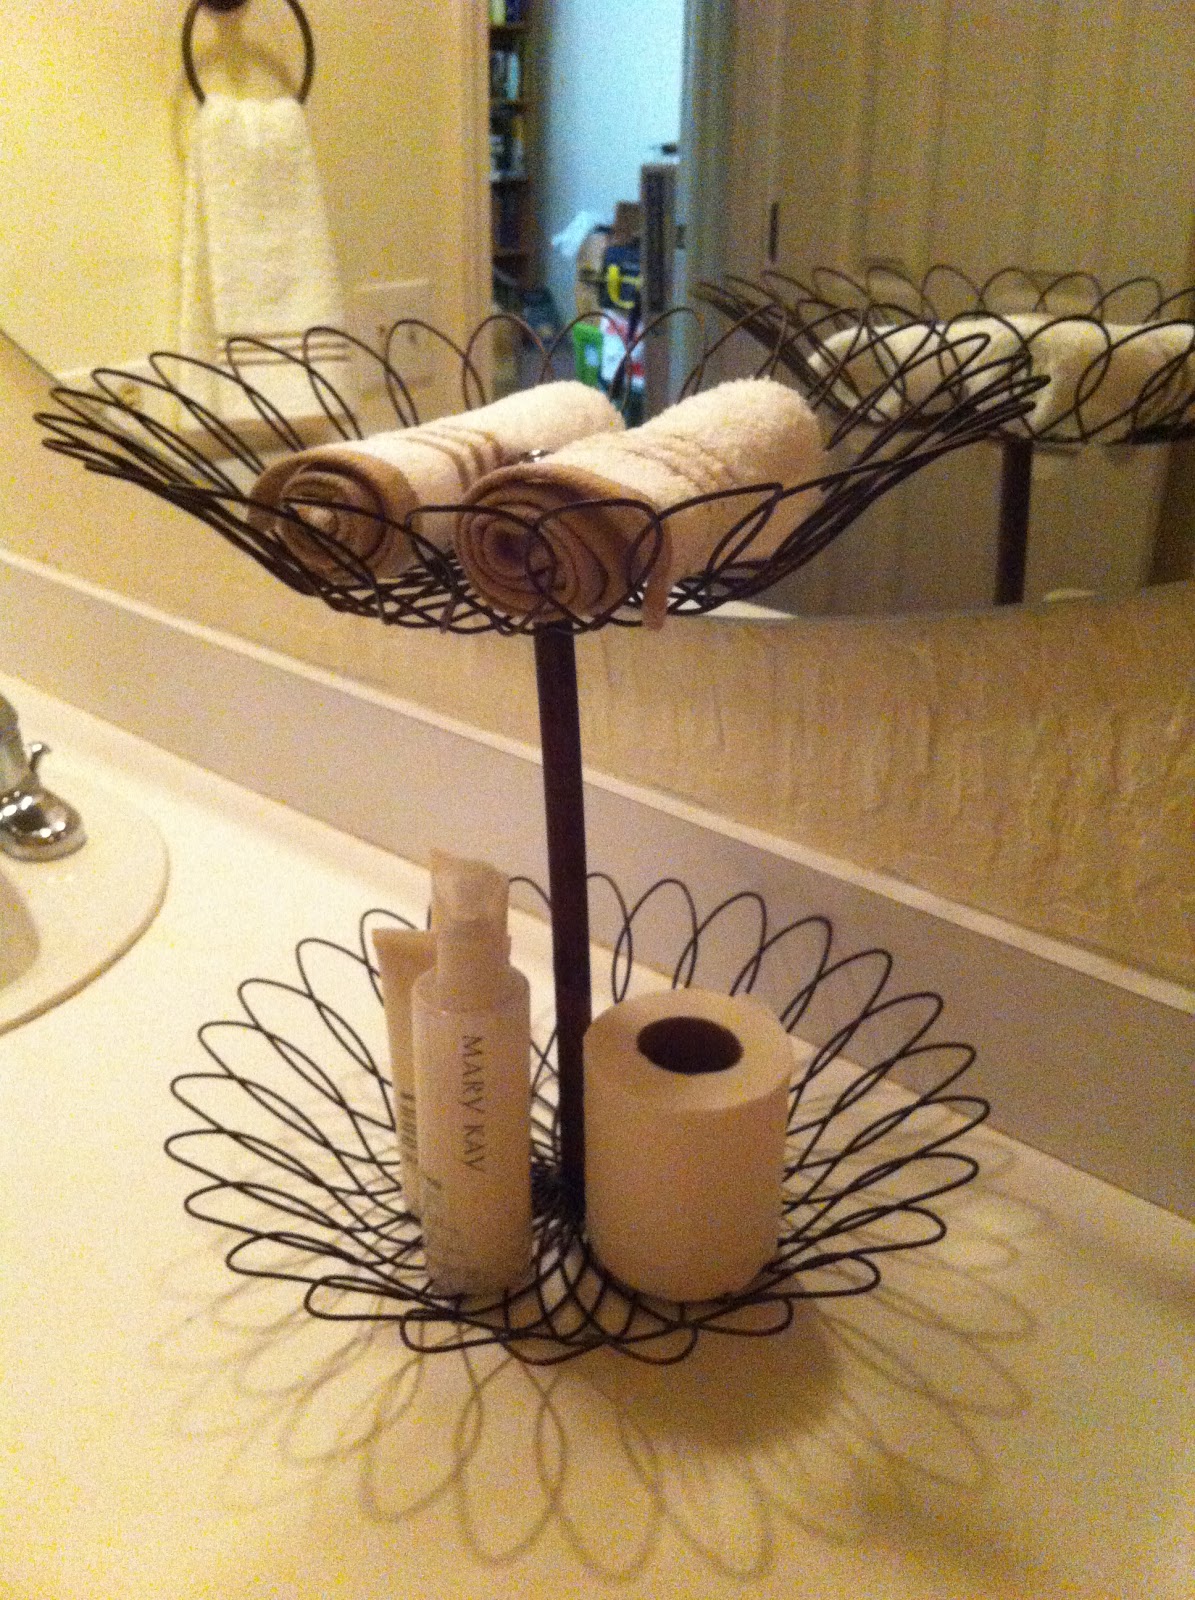
The next thing I wanted to do was make matching wall art. I loved how the bowl looked like a flower but I didn't want it being so deep and jetting out from the wall. So I turned it upside down to smoosh it flatter. Actually I sat on it, that made it just right :)

I took all of the parts off of the cabinet pull and ran some gold wire through it that I had. I chose gold because the bead has some gold in it. then I just ran it through the holes, tied it on and hung it up!


This is the final product. I think it helped fill the bare, ignored space. Not bad for $20 worth of supplies and an hour of my time! 
You could make so many variations of this depending on the bowls, what you use as a rod, different knob/bead styles, etc. The possibilities are endless. Happy crafting!

Monday, July 23, 2012

Hand-Me-Down Lamp Re-do

When my husband and I got our first place we got a pair of hand-me-down lamps from my mom. Now I'm not saying they were ugly, that's harsh. But the color and finish wasn't ideal and the shades were dust traps. I have a severe allergy to dust mites so I need a lampshade that is easy to wipe down.

As I mentioned before, I'm not big on spending money if I don't have to and lamps aren't cheap, so I didn't want to let these go to waste.

Cue the spray paint and 2 new shades from Target...

And ta-da! For about $12 these lamps are totally updated.

Now I know what you're thinking...all it is is spray paint and lamp shades, anyone can do that. Exactly! Anyone can do that and yet most people don't think about it! Save your money for things you can't make or do on your own. I could have gone out and spent almost $50 on two new lamps and shades, but I like having gas in my car (I'm spoiled like that).

Please leave a comment, tell me what you think. Have you jazzed up anything laying around your house to make it more modern? I want to hear about it!

I don't even own a record player...

But when I went to the record store and found this for $12 I just had to get it!  
At first I thought, "Oh, how cute would it be to frame it with that song lyric, 'You spin me right round baby right round, like a record baby'". I thought I was so clever and got a little too excited about my cleverness and ended up with this...

I just wasn't feeling it. First off, my hand writing was atrocious. I got in a hurry which is a big no no with a sharpie in your hand! Second, it was too busy in my opinion. And finally, I wasn't feeling the lyric anymore. I felt that it was less clever and more cheesy, so I hit google to search for a new quote. Luckily the frame came with 2 frame mats already in it. With that and a little patience and neater hand writing I got this...


OK, so I was now happy with the quote, neatness, etc., but the picture went from being too busy to plain Jane so I went to Hobby Lobby and got some musical themed scrapbook paper and now I have this...


I am so happy with the finished product. It just goes to show that art is a journey. It's not always easy, but don't just drop it. If it's worth doing it's worth perfecting! I'd love to hear your comments. Let me know if you've ever stumbled across a unique article and how you chose to display it!

Sunday, July 22, 2012

The Sad Little Table On the Curb

The other day I was riding through a very nice neighborhood and saw a man cleaning out his garage. He had put this table out for garbage day.
As you can see, it was a little sad and rusty, but in the words of the great Linus, "It just needs a little love". So of course I asked the man if he was just going to throw it away and he let me have it! The interesting part was driving home via the interstate with it hanging out of the back of my Honda for 45 minutes. I drove 20 below the speed limit for fear of a pot hole dislodging it...I got a lot of dirty looks!
But I degress! So anyway, I got it home and my husband helped me unload it. The next day I attacked it with a steel brush to knock off some of the loose paint and rust. I coated it with this spray paint to get a hammered look. This was the only thing I had to buy for this project b.t.dub! Oh and I always wear gloves when I spray paint because I always manage to get it all over my trigger finger. They make my hand stink but it's totally worth it!
Now a lot of people said, "Ooh, you can put glass in it". Negative! 1. I'm much too clumsy and prefer to keep glass in the home to a minimum for that reason. 2. I hate cleaning glass, I'd rather dust any day. 3. Glass and metal are too "modern" looking for me. I prefer rustic, natural and imperfection in my decor and, 4. It would cost like 25 dollars to get it cut and this project is supposed to be cheap. Let's face it, that's my gas money! So instead I picked up a pallet for free :). So I took a hammer to the pallet, smacking it around a bit until I had all of my separate pieces
The boards were plenty of wood but weren't thick enough for the "flush" top I wanted. Luckily I had these 1/2 inch thick wood slats that my mom was throwing away and the hubs said, "You could probably find something to do with those" (he knows me so well). They were the perfect size! I cut them down to size and secured them with caulk, easy peasy!
Then comes the fun measurement and sawing part. I did not take a picture of this as my hands were full, but we're all adults here, we get how to measure and cut things :) P.S., I do not handle electric saws, that was my husband's assignment. But if you do, you too are my hero!


Now I really liked the rustic look of this wood, but I wasn't terribly crazy about the contrast of that and the color of the metal. I also wanted to camoflage the bright silver nails I used to secure the boards in spots so I stained it. 
Then, because I'm terribly impatient, I went to the store and when I got back it was ready to put in it's new home! I think it looks perfect on my cross wall (which is a work in progress, still collecting!) and I love it with the wall color. If you love it too, tell me what you think! What would you have done differently? And do you have any curbside finds you turned into treasure? I'd love to hear all about it!

I've never been good at keeping a diary...

So I don't know whey I thought I'd be any better at blogging! The fact of the matter has been that the last 8 months have been terribly busy! But here I am, back again and going to give it the old college try!

My husband and I bought our first home in February of this year and we love it! It is in wonderful condition for a 45 year old home, but there's just some personalization that needs to be done here and there. That's what this blog is going to focus on: fixing up our home on a teacher's budget and any other little domestic tid bits I happen upon! I hope you'll see something on this page that will inspire you :)

Sunday, October 30, 2011

Getting to know you, getting to know all about you...

Let me take a minute to introduce myself. Well, the parts that aren't in the "about me" section. I have been married since May, 2011 to my best friend and biggest supporter, Charlie. He's one of those guys that brings you flowers just because, makes me laugh when I want to cry and supports all my endeavors, no matter how ridiculous. Seriously, I could probably say I want to enroll in belly dancing school and he'd find a way. I'm pretty stinkin' blessed!

Our most recent endeavor is vegetarianism. Now, I have always been a meat and potatoes kinda gal and I have the waistline to prove it. Charlie and I have said time and time again we need to lose weight and get healthy. A few weeks ago the light bulb finally clicked and rather than just saying it we started working on making it happen. In doing research, Charlie started really looking into the effects of meat on your body as well as the treatment of animals. Since then he hasn't had any meat at all and I've had significantly less (I had a few weak moments). Is this a phase? Maybe. But I've gotta say I feel better in just the last two weeks than I've felt in a while.

As I mentioned, we're on a budget. There is always that concern, "It's too expensive to eat healthy, yadda, yadda, yadda". Well, we can't use that excuse anymore. We've got to make it work, so here goes!

Well, that's the first thing on my mind for tonight and I do hope you'll pop by once I get busy posting more of the interesting stuff. Ya' know, projects and vegetarian recipes that don't make me miss meat too much, etc. Until then, take a good look at the world around you and be inspired.